Unlock Smooth Hazelnut Butter: Essential Skin Removal Tips
There's nothing quite like the creamy, rich, and uniquely nutty flavour of homemade hazelnut butter. While store-bought options are convenient, crafting your own allows for unparalleled freshness, control over ingredients, and a truly superior taste experience. Imagine it spread on warm toast, drizzled over oatmeal, or incorporated into your favourite desserts. The journey to this culinary delight begins with a crucial, often underestimated step: removing the skins from the hazelnuts. Overlooking this detail can transform your luxurious hazelnut butter into a gritty, slightly bitter disappointment. But fear not – with a few simple techniques, you'll be on your way to velvety smooth perfection.
Why Skin Removal is Paramount for Perfect Hazelnut Butter
Many first-time makers wonder if stripping the hazelnuts of their thin, papery skins is truly necessary. The answer, unequivocally, is yes. The skins, while harmless, contain tannins, which impart a distinct bitter flavour. Leaving them on will undoubtedly affect the final taste profile of your hazelnut butter, giving it an unwanted sharp edge that detracts from the nut's natural sweetness and richness. Beyond flavour, the skins also contribute a less desirable gritty or coarse texture, preventing that silken consistency we all crave in a premium nut butter. For a truly smooth, melt-in-your-mouth experience, a thorough skin removal process is non-negotiable.
The Classic Roasting and Rubbing Method: Your Go-To Technique
The most widely adopted and highly effective method for skin removal involves a simple combination of heat and friction. This process not only loosens the skins but also deepens the hazelnut's flavour by lightly toasting them, releasing their aromatic oils.
- Preheat Your Oven: Start by preheating your oven to 350˚F (180˚C). This moderate temperature ensures even roasting without burning the delicate nuts.
- Arrange Hazelnuts: Spread your raw hazelnuts in a single layer on a rimmed baking sheet. A single layer is key for uniform roasting; overcrowding can lead to uneven cooking and skins that don't loosen properly.
- Roast to Perfection: Place the baking sheet in the preheated oven and roast for approximately 10-15 minutes. Keep a close eye on them! The goal is for the skins to darken and crackle slightly, and the hazelnuts themselves to turn a beautiful golden brown and become wonderfully fragrant. They should smell nutty and rich, not burnt. If they don't seem quite ready after 15 minutes, give them another couple of minutes, checking frequently.
- Cool Slightly: Once roasted, remove the hazelnuts from the oven and let them cool on the baking sheet for a few minutes until they are warm enough to handle comfortably but not scorching hot. This brief cooling period helps the skins become even more brittle and easier to remove.
- The Rubbing Ritual: Transfer the warm hazelnuts in batches to a clean, thick kitchen towel. A rough-textured towel, like a dish towel or even a paper towel (though less durable), works best. Fold the towel over the hazelnuts and rub them vigorously between your hands. The friction, combined with the heat, will cause the skins to slough off. You'll be surprised at how easily they come away! Don't worry if a few stubborn bits remain; a couple of small pieces won't significantly impact the final texture. If a large portion of skins remains after robust rubbing, the hazelnuts might need another few minutes in the oven to loosen further.
- Separate and Enjoy: Once rubbed, gather your now-skinned hazelnuts. You can gently shake them in a colander or pick out any remaining loose skin fragments.
This classic method is tried and true, yielding perfectly prepped hazelnuts ready for their transformation into luscious Easy Homemade Hazelnut Butter: A Simple Guide.
Beyond the Bake: Alternative Skin Removal Techniques and Shortcuts
While roasting and rubbing is the gold standard, there are other methods and shortcuts that might suit your needs, especially if you're dealing with particularly stubborn skins or looking for a time-saver.
The Boiling with Baking Soda Method
Some find success with a brief boil to loosen skins. This technique, while effective, introduces moisture, which can potentially "seize" your nut butter in the food processor if not fully dried. However, if you're battling exceptionally clingy skins, it's an option:
- Prepare the Solution: Bring a pot of water to a boil. For every cup of water, add about 1 tablespoon of baking soda. The baking soda helps to break down the skin's structure.
- Brief Boil: Add your hazelnuts to the boiling solution and let them simmer for just 2-3 minutes. You'll notice the water turning a dark reddish-brown as the tannins from the skins release.
- Shock and Rub: Drain the hazelnuts immediately and plunge them into an ice bath to stop the cooking process. Once cooled, proceed with the rubbing method using a kitchen towel, similar to the roasted method.
- Crucial Drying Step: If you use this method, it's absolutely vital to thoroughly dry the hazelnuts before processing. Spread them in a single layer on a baking sheet and either air-dry for several hours or place them in a low oven (around 200°F / 95°C) for 15-20 minutes, stirring occasionally, until completely dry. This prevents any moisture from interfering with your hazelnut butter's consistency.
The Blanched Hazelnut Shortcut
The ultimate shortcut for skin removal is to purchase blanched hazelnuts. These are hazelnuts that have already had their skins removed, saving you a significant step. If you're lucky enough to find them at a specialty grocery store or an international market (like many Turkish markets), grab them!
- Roast for Flavor: Even if blanched, you'll still want to roast them. Roasting brings out their inherent flavour and helps to release their natural oils, which are essential for creating a smooth, creamy nut butter. Simply spread them on a baking sheet and roast at 350˚F (180˚C) for about 5-10 minutes until golden and fragrant.
- Cool and Process: Allow them to cool slightly before transferring to your food processor.
This method drastically cuts down on prep time, making homemade hazelnut butter even more accessible.
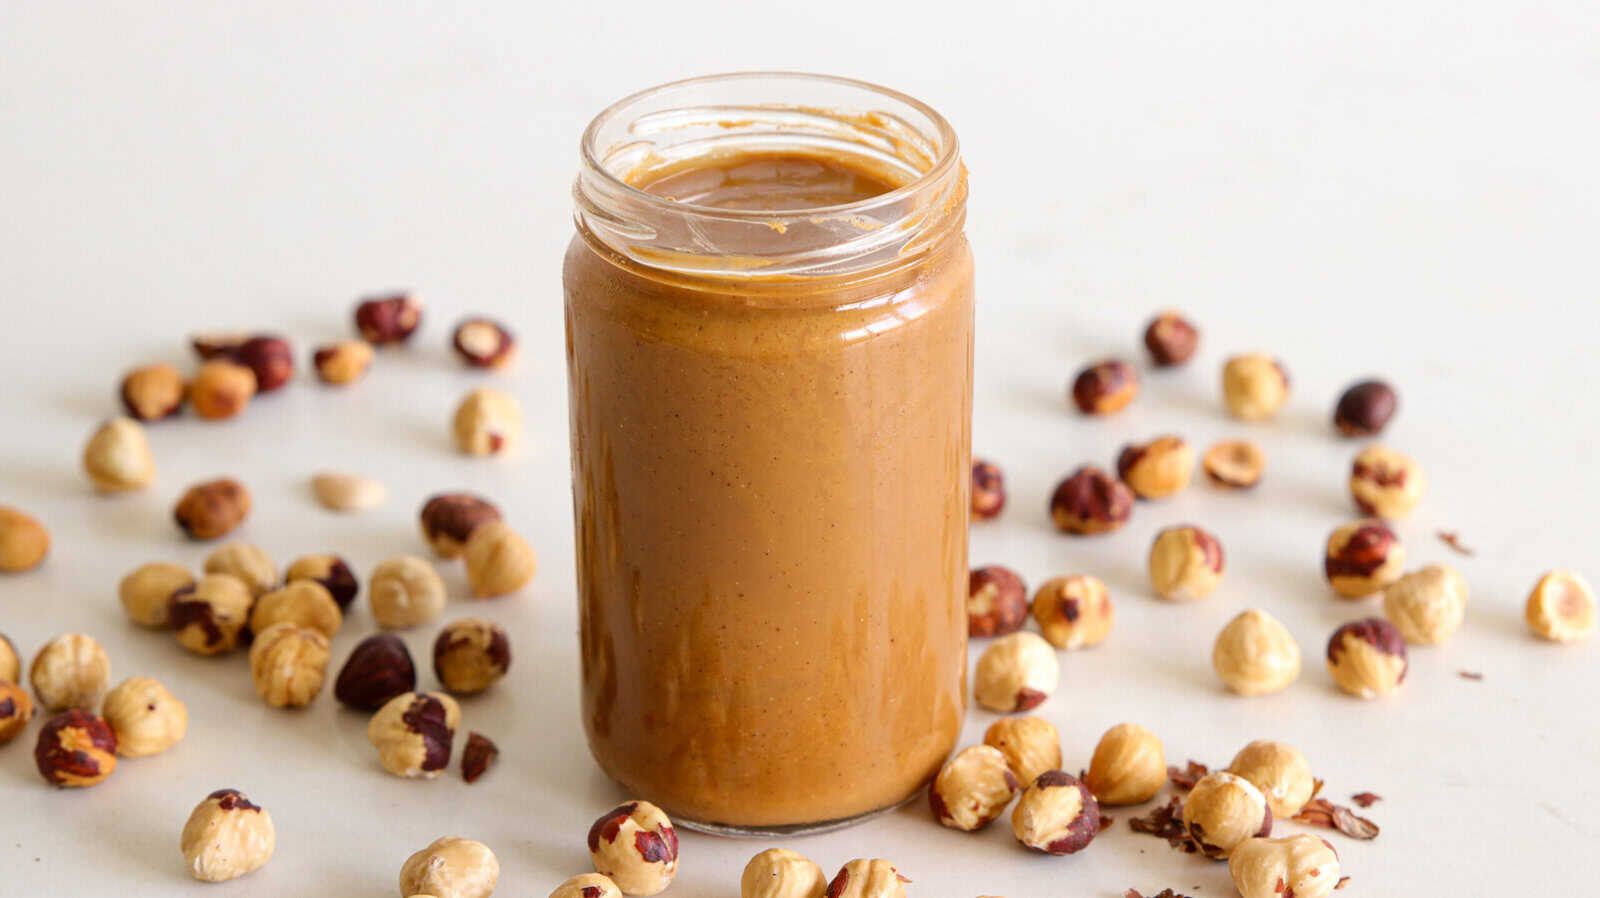
Transforming Hazelnuts into Irresistible Hazelnut Butter
Once your hazelnuts are perfectly skinned and roasted, the magic truly begins in your food processor. The transformation from whole nuts to a pourable butter is fascinating to watch.
- The Processing Journey: Add the cooled, skinned, and roasted hazelnuts to your food processor. Initially, they will chop into coarse crumbs, then break down into a fine meal.
- Release the Oils: As you continue processing, the natural oils will begin to release. The mixture will transition into a thick, paste-like consistency, then a sticky ball, and finally, after about 5-15 minutes (depending on your food processor's power), a wonderfully smooth, liquid hazelnut butter. Be patient and scrape down the sides of the bowl frequently to ensure even processing.
- Season to Taste: This is where you can personalize your creation! A pinch of sea salt enhances the nutty flavour. For a warm, comforting twist, a dash of cinnamon is delightful. You could also experiment with a hint of vanilla extract or even a touch of maple syrup for sweetness.
- Storage: Transfer your freshly made hazelnut butter to an airtight container and store it in the refrigerator for up to two weeks. The oils may separate slightly over time; simply stir it before use.
Unleash the Versatility of Your Homemade Hazelnut Butter
Now that you've mastered the art of making smooth, delicious hazelnut butter, the possibilities are endless. Its unique flavour profile makes it incredibly versatile, elevating both sweet and savoury dishes.
- Breakfast Bliss: Spread it generously on toast, bagels, or English muffins. Swirl it into a warm bowl of oatmeal, drizzle it over pancakes, waffles, or crepes for a decadent morning treat.
- Smoothie Enhancer: Boost the flavour and creaminess of your morning smoothie. It's a fantastic alternative to other nut butters, adding a gourmet touch.
- Baking & Desserts: Use it as a filling for hazelnut butter cups, similar to peanut butter cups, for an irresistible confection. Incorporate it into brownie batters, cookies, or energy balls. Imagine a rich Homemade Hazelnut Butter: Versatile Uses for Every Meal in a no-bake pie crust!
- Savory Pairings: While often associated with sweets, hazelnut butter can add depth to certain savoury dishes. Consider a dollop in a sauce for roasted vegetables or as a unique element in a salad dressing.
The journey from raw hazelnuts to a silky, flavorful hazelnut butter is a rewarding one. The seemingly small step of skin removal makes all the difference, ensuring a smooth texture and pure, unadulterated nutty taste. By following these essential tips, you're not just making a spread; you're crafting a gourmet ingredient that will elevate your culinary adventures. So, go ahead, unlock the potential of hazelnuts, and enjoy the unparalleled satisfaction of homemade perfection!
